ARCHIVAL MARKING & LABELLING IN FOSSIL COLLECTIONS
We use archival marking to give specimens or fossils unique numbers or letters, linking them to a separate catalogue record. This allows us to store a lot of information on even the smallest fossils. Museums do this for each specimen they accession (acquire), but you can do this for your personal fossil collection as well. Recording information about your private fossil collection makes it more meaningful. There is no obligation to catalogue or mark your fossils if they are privately owned, but it increases its value (in terms of scientific value, monetary, interest and intrigue, or all of these).
In the old days, labels were often kept with the fossils but these can easily be lost, misplaced or disintegrate. You will have seen ancient labels stored with old Victorian fossils. It’s hard to imagine that they didn’t look like that when they were first produced! They were probably a nice white colour, with neat edges and no creases, and neatly filled out. Time ages labels very poorly, and after enough time has passed, they usually look like that ‘pirate treasure map’ you made in school, staining it with tea and tearing the edges.
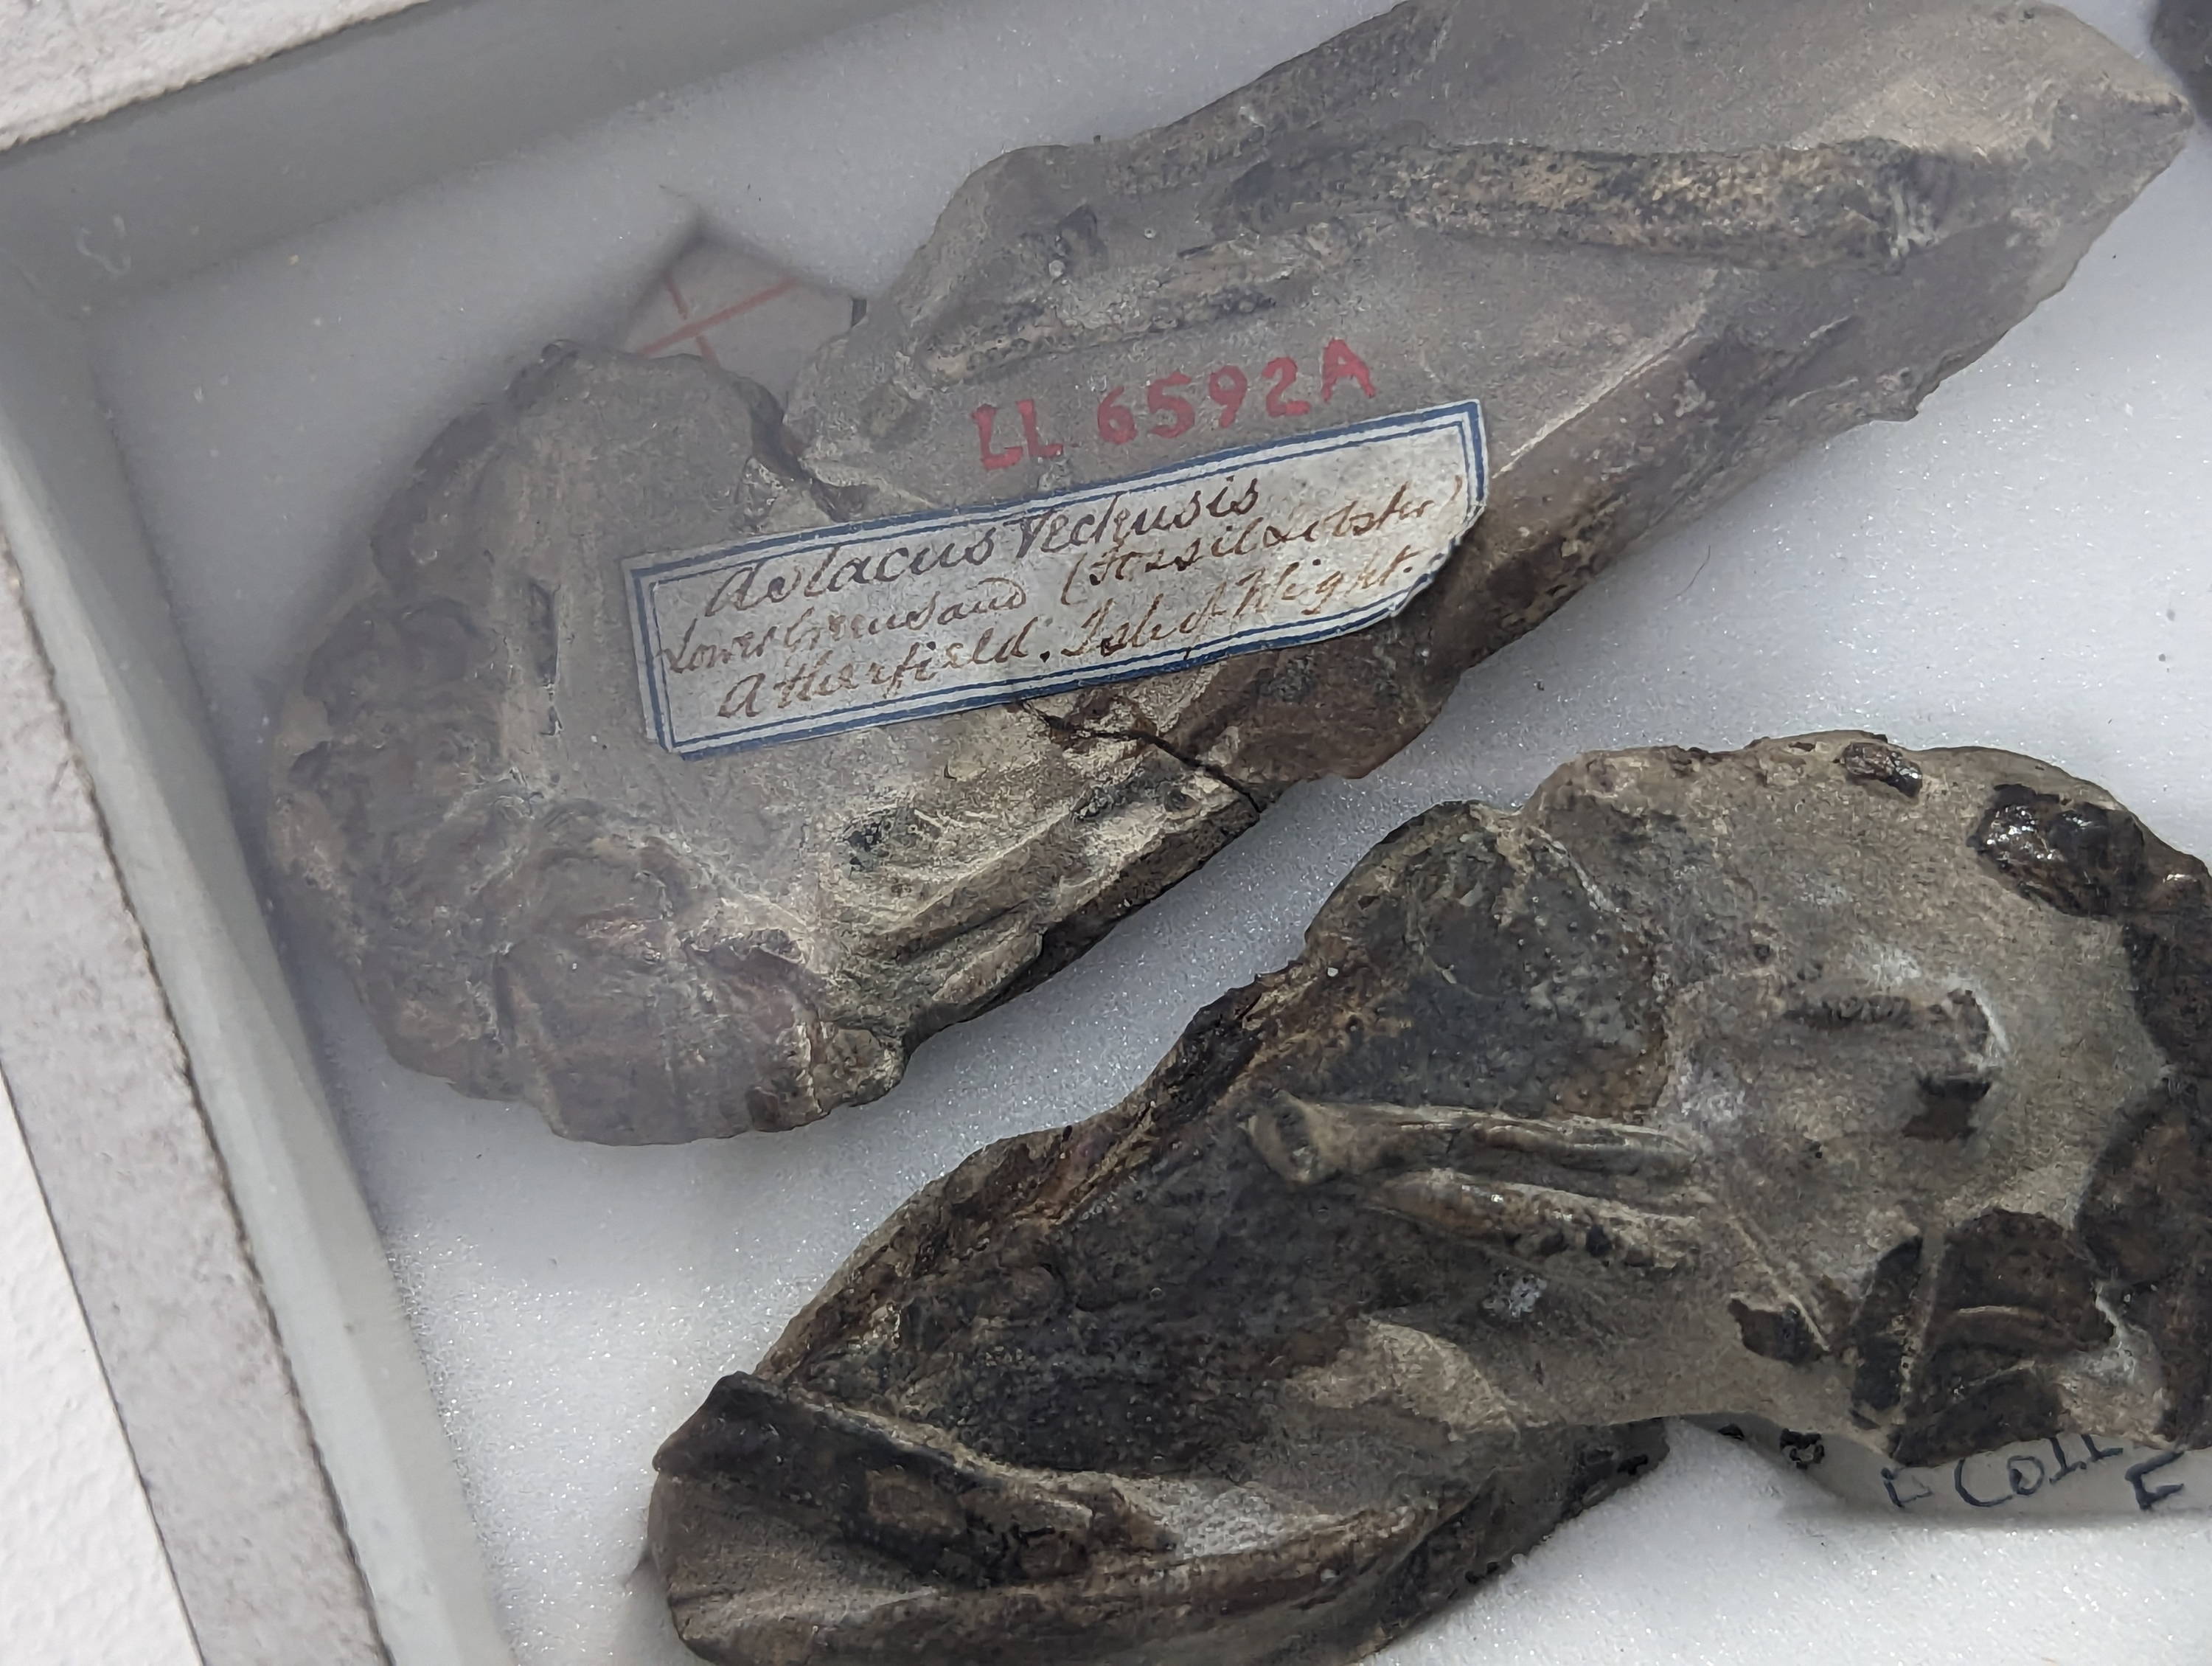
An old label lightly adhered to a specimen. You can see that the label has partially peeled away and that the ink is rapidly fading. The handwriting also makes it a little tricky to read! Notice a later accession number has been put on the fossil. In a museum, nothing is ever thrown away, so when a label is superceded, it is still considered part of the history of the specimen and is thus kept with it (even if it not actively used again).
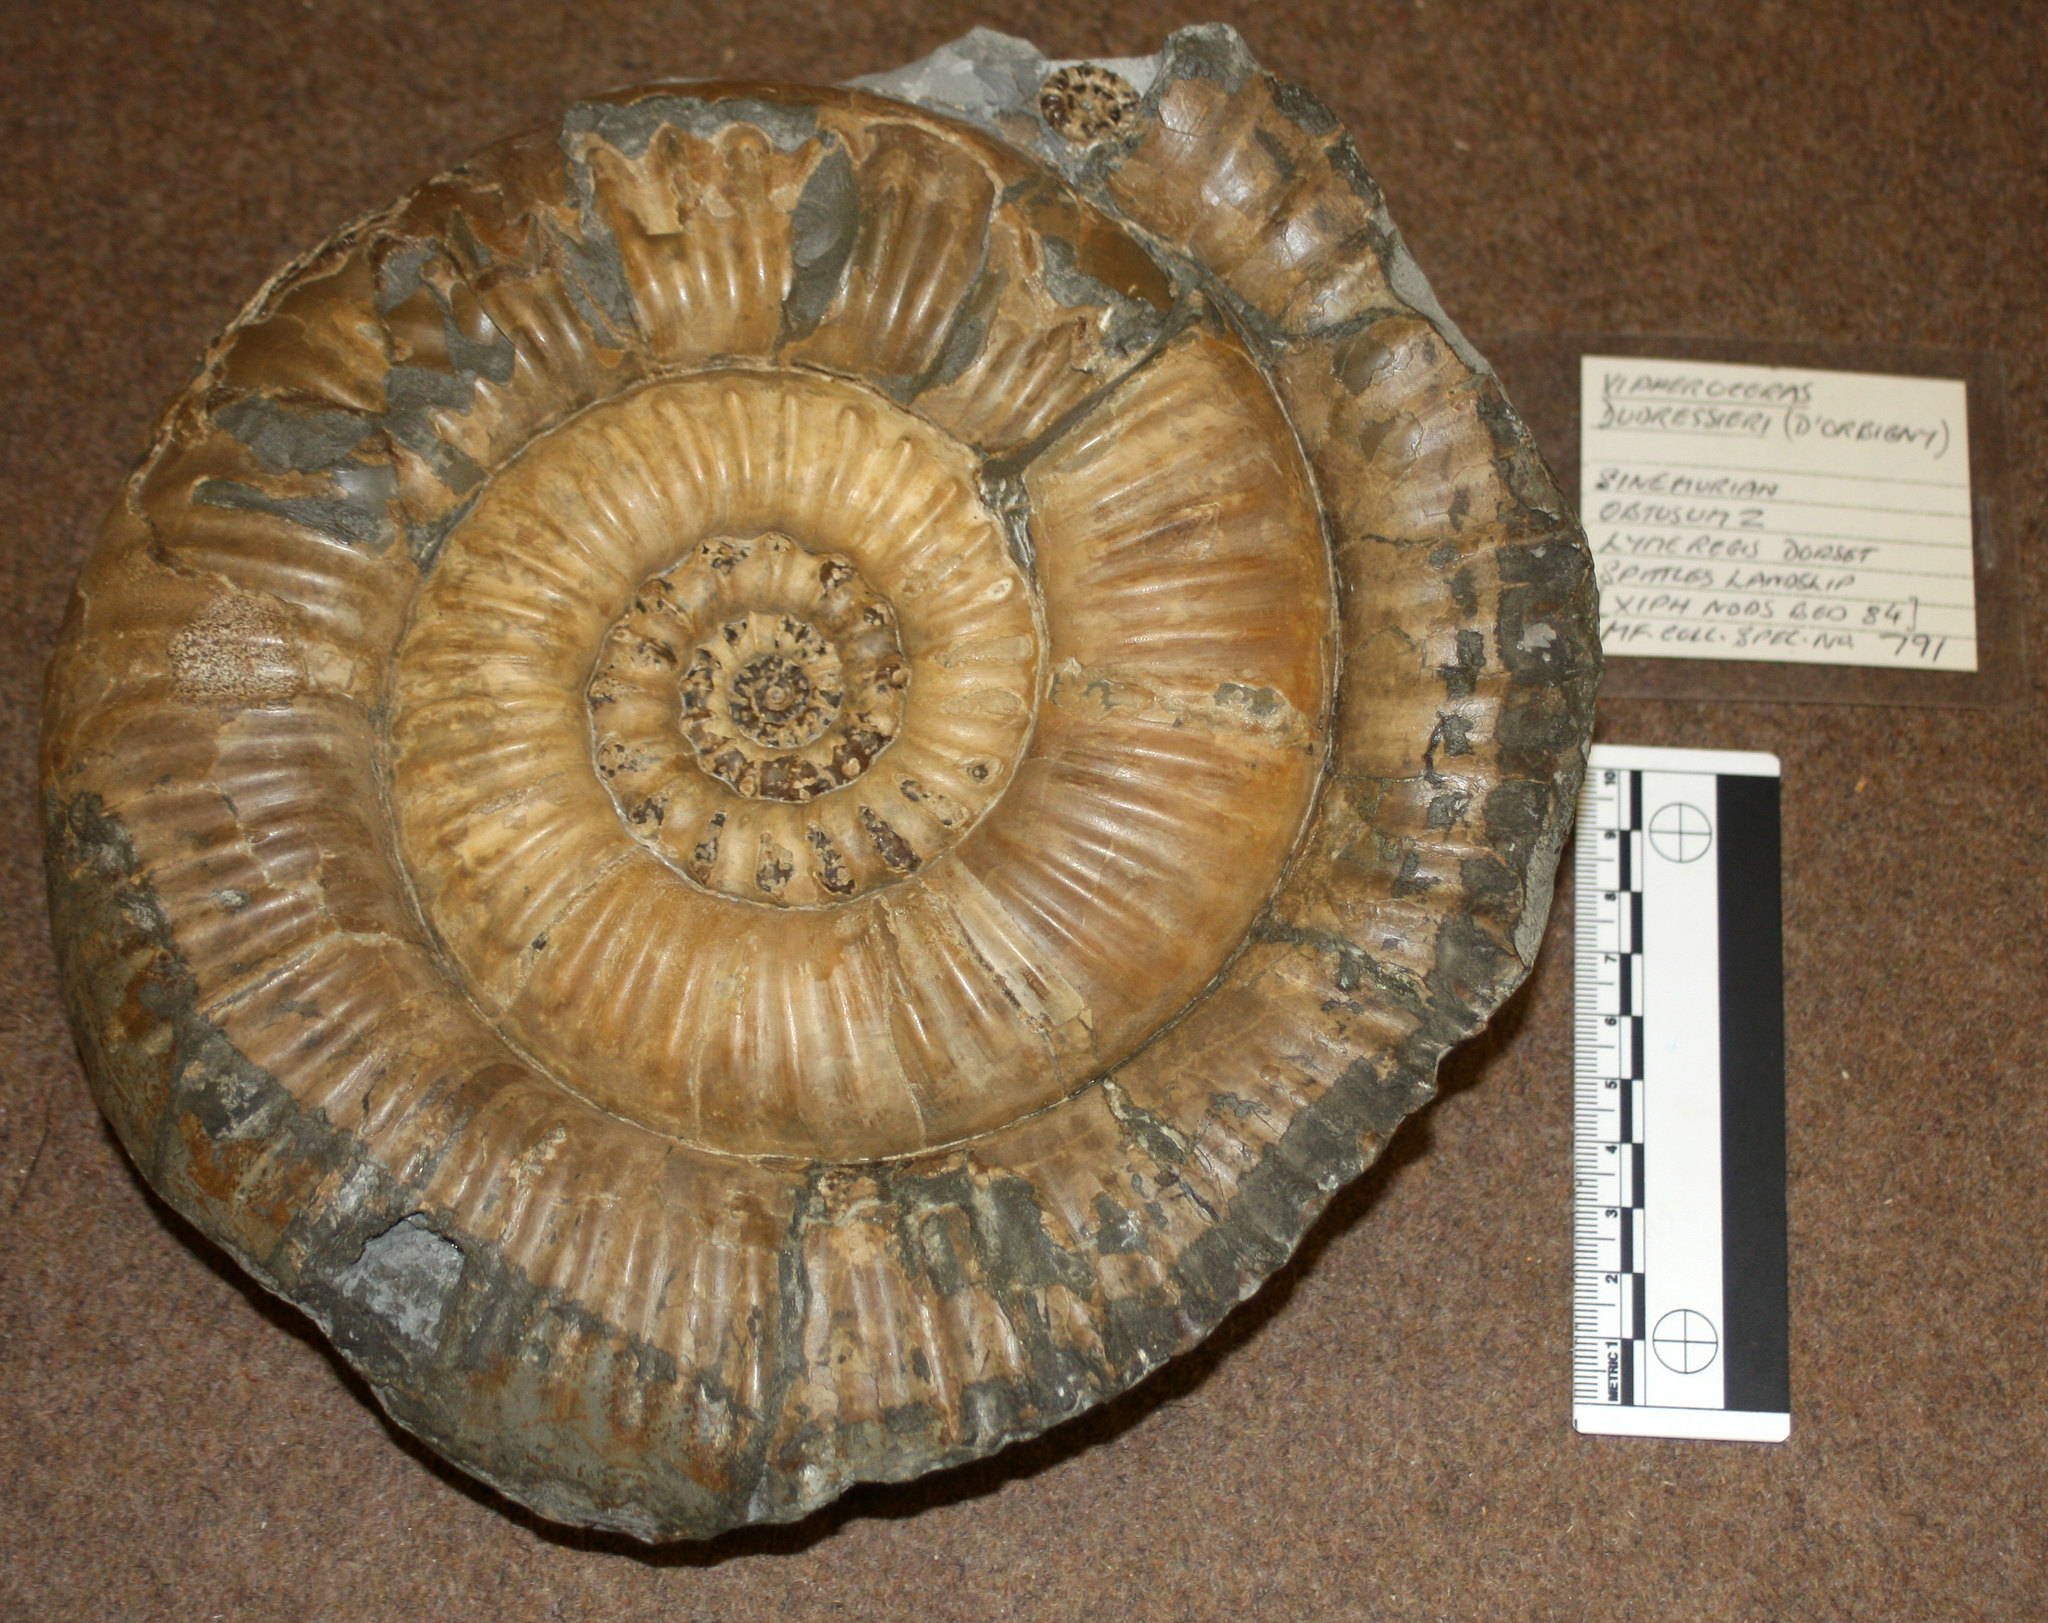
Semi-modern label. Whilst the label is very informative, you can see how easy it would be to separate this specimen from its label. Photo: Chris Andrew
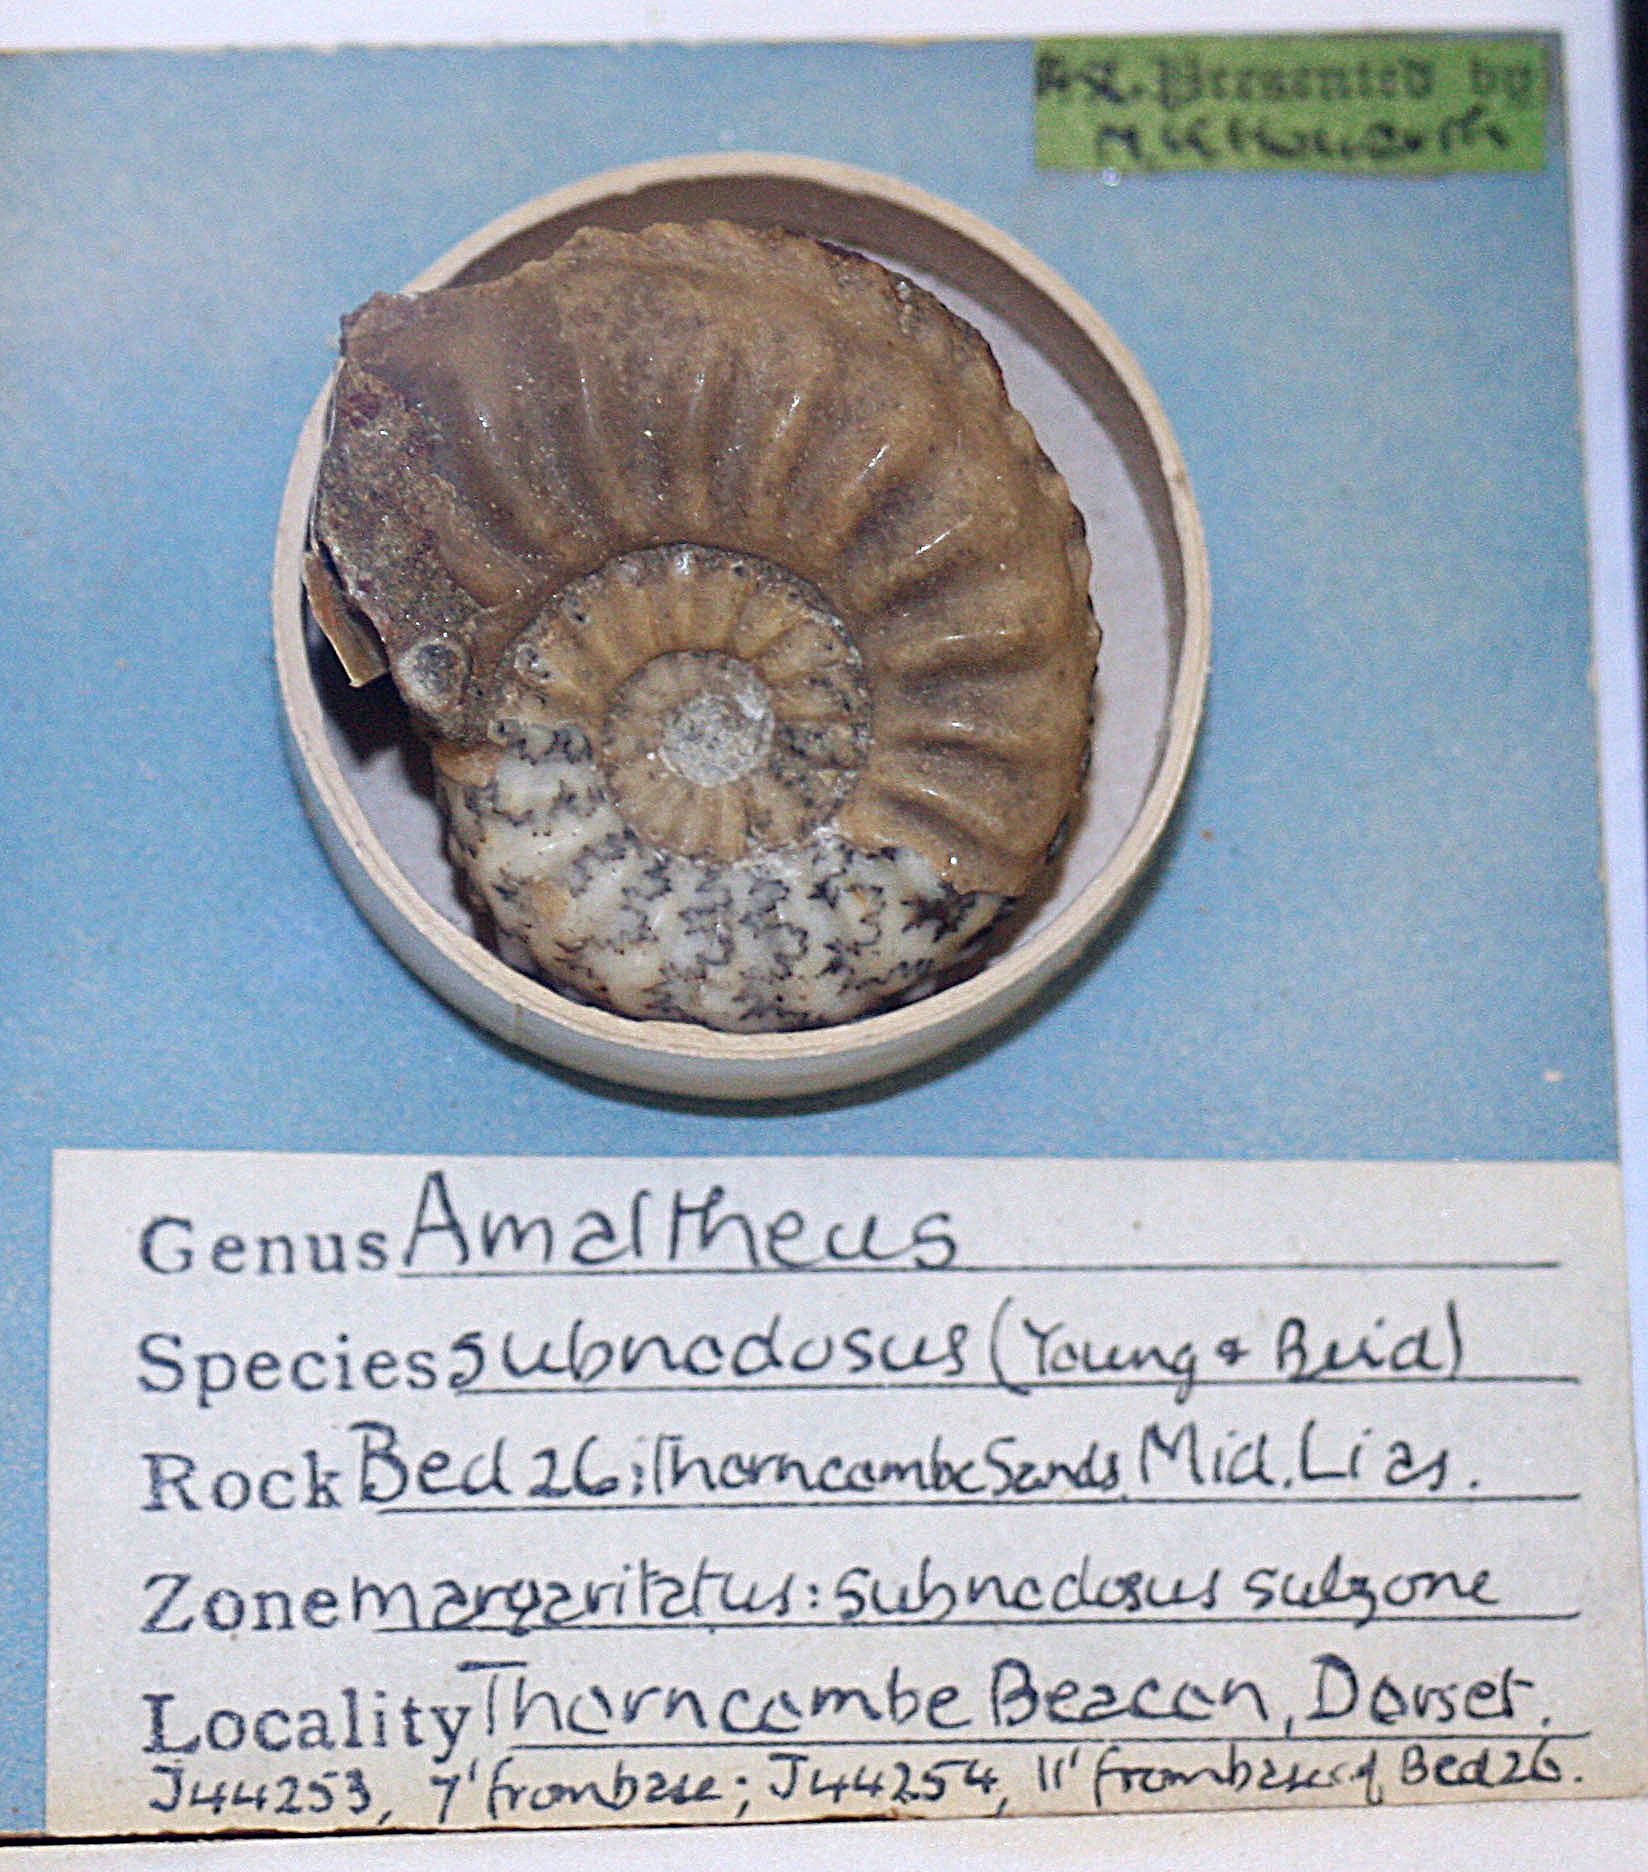
A semi-modern address-type label that was stuck onto the fossil. The adhesive on these labels does not usually stick very well (especially after a prolonged time), and the text has faded to the point that it is no longer legible. We can only hope that the data was transferred before this label could no longer be read.
OK, separate labels are not a good idea. What do we do instead?
It is much simpler and considerably less risky than a separate label, to give a specimen a number, which can belinked to other more extensive records or archives (either in writing, on a computerspreadsheet or in a database). So how do we mark fossils with a number? How can we be certain that it won't rub or fall off? How can we remove it if the fossil changes hands? There are a few guidelines generally followed by museums worldwide. In private collections, we tend to follow the same principles as museums for the same reasons – you want long-lasting, secure, durable, reversible and discreet markings on your fossils. You want the markings to be permanent, but easily removed if intended.
The Collections Trust have a series of guidelines for marking/labelling objects. Source: Collections Trust 2009-2020. These guidelines are linked at the bottom of the page for anyone interested.
- Secure
- Reversible
- Safe for the object
- Discreet but visible
- Convenient and safe
The Collections Trust guidelines cover all sorts of objects that may be found in a museum, from paintings, to textiles, to wood, ceramics, taxidermy, etc. We will be focussing (of course) on fossils collections in this article, but the same principles will apply for geological and mineral collections.
WHERE DO I PLACE THE MARKING?
- Location, location, location! You don't want the marking to be the first thing you see when you look at a fossil, but it's also important to be able to find it quickly when you need it.
- If the fossil is within its matrix, mark the matrix not the fossil.
- Consider the scale of the marking. Whilst a tiny marking on a tiny fossil is appropriate, you don't want to spend hours searching for a miniscule marking on a sauropod femur that's bigger than you. The marking needs to be scaled appropriately for the fossil.
- With palaeontological specimens, we also must be aware of not obscuring any important, diagnostic or interesting features with our archival marking. For example, if an ammonite has a pathology, you wouldn't put the marking directly over this.
- Avoid weak or fragile structures that may be prone to breaking off. If you are nervous of this, or your fossil is in multiple parts, give each one a number and a suffix (e.g. OBJECT-a, OBJECT-b, and so on).
- Avoid placing a label or marking over a fracture, mineral vein or previously glued surface.
- Choose a substrate that is not too porous or likely to be rubbed off - if you only have porous surfaces, make sure the fossil is well consolidated with Paraloid B-72 and that the surface has been strengthened with the resin.
- If you have to label a box rather than the fossil (which maybe the case with very small items like sharks teeth, or a box containing anumber of specimens under the same collection number), label the box not thelid. It’s very easy to misplace lids, or mix them up.
- Don’t place the number on an underside surface that is incontact with a surface. As you pick things up and look at them, the number maygradually wear away. If you place it somewhere that isn’t going to be subjectto wear or friction it is considerably less prone to wear. Friction won’tnecessarily dislodge a marking in a year, but after 10-50 years of beinghandled, it’s possible.
WHAT DO WE USE FOR ARCHIVAL MARKING?
Let's start with what we DON'T use.
Nail polish formulations vary depending on the manufacturer, but they are exclusively designed for short term use and will yellow and crack in UV light over time. The polymers will cross-link and the marking will be lost.

Pictured below are some items inherited from a family collection of curiosities and 'sentimental rocks'. Each and every one of these items is labelled with where it came from and the date. We can see the use of correction fluid (white), an address label with non-archival ink which has faded, permanent marker directly onto the surface of Roman concrete, and an ink pen written on a rough surface that has since faded considerably. With all of these objects, the writing cannot be removed without damaging the object.
The exception of course, would be the self-adhesive label, which could either come off far too easily or refuse to come off altogether. The label is only dated 1984, which many of you reading this will remember like it was yesterday, but you can see the normal pen ink used has faded considerably in such a short time. The adhesives in the label may also stain the surface underneath.


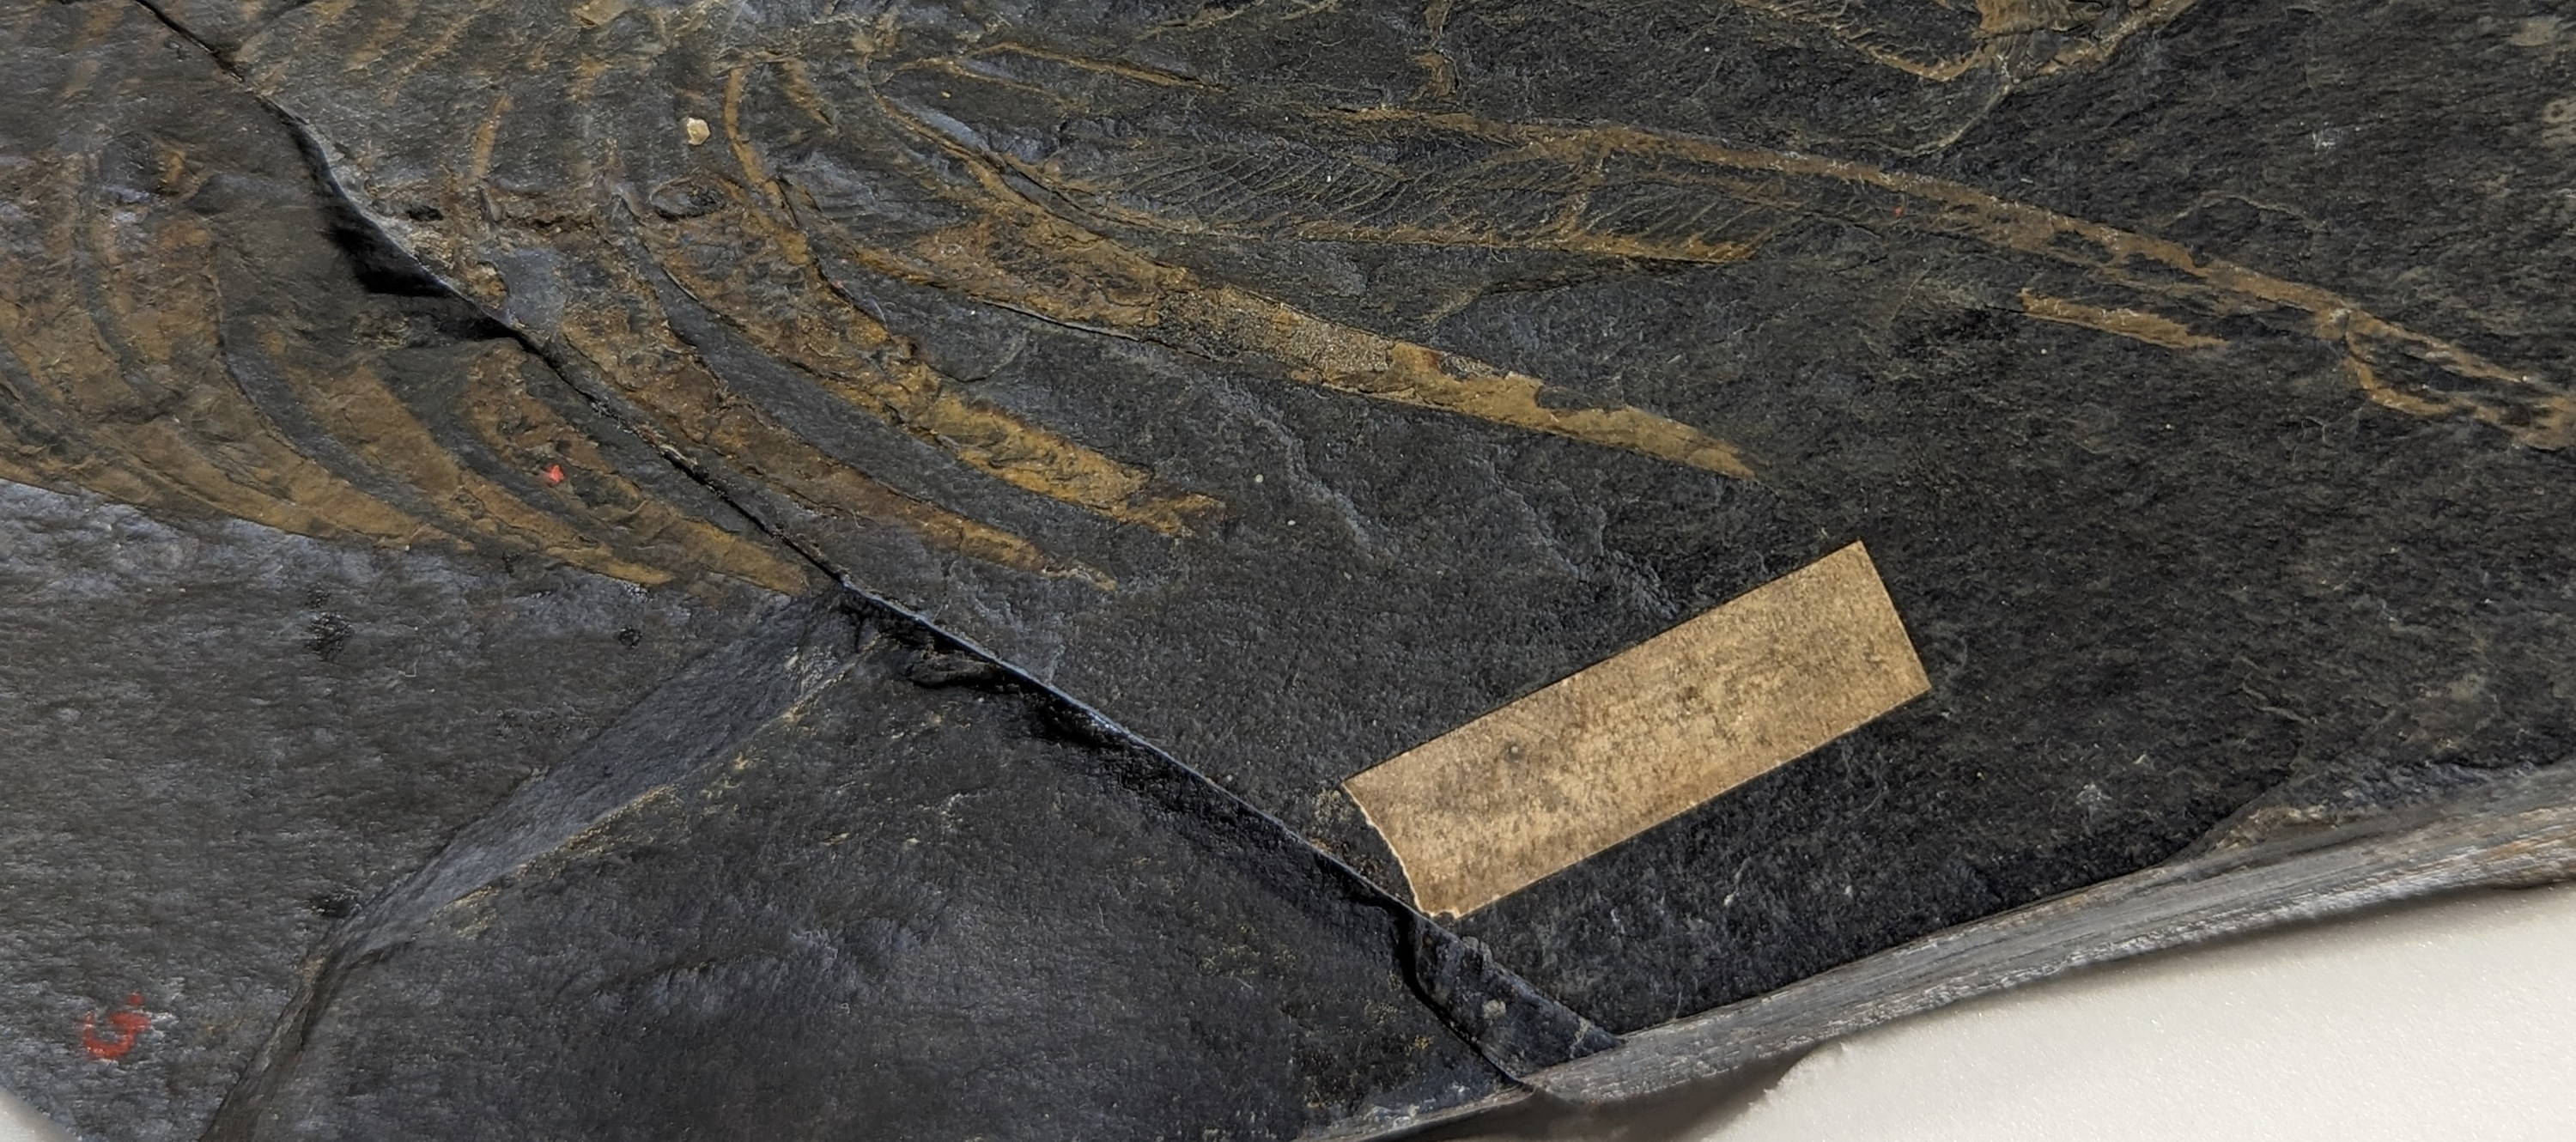
This label was glued on with PVA glue and not sealed with a top coat. You can see it is peeling away and almost separated entirely from the fossil.

This label was applied with PVA glue. You can see that in only 2-3 years the adhesive has gone very yellow.
THE MUSEUM-GRADE APPROACH
By using very specific materials you can acheive a secure, reversible, and stable marking that will potentially last many centuries if not longer. We use a familiar acrylic resin that many fossil enthusiasts will have in their workshop anyway, Paraloid B-72. Other parts of your archival marking kit will have to be sourced especially for the job such as Paraloid B-67 in white spirit. We have archival marking kits for sale to get you started.
Here is a list of items you might find in an archival marking kit, specifically tailored to geological, fossil and mineral collections:
- Paraloid B72 in Acetone
- Paraloid Adhesive
- Paraloid B67 in White SpiritAcetone
- White Spirit
- Crow Quill Pen
- Acrylic Paint (Golden Acrylics Titanium White)
- Acid Free Paper (Thin & Bristol board)
- Brush (solvent-resistant)
- Waterproof, lightfast pens such as Sigma Micron Pen, Identi-Pen, Technical pen with permanent, lightfast carbon based ink (e.g. Rotring 591 017 black ink).
- Safety glasses
- Cotton swabs
- Gloves

So how do we put this lot together to come up with something that could last for centuries or longer? We call it an archival sandwich. The plate is the fossil/specimen, and the archival information (the filling) is sandwiched between two different layers of resin (the bread). The topcoat and basecoat always remain the same, but there are different ways of filling the sandwich depending on the specimen and your personal preferences.

Layer 1: BARRIER COAT
Layer one is Paraloid B-72 20% wt/vol in Acetone. This is the layer always in contact with the fossil or the matrix. This layer acts as a barrier between subsequent layers and the specimen. Paraloid B72 is famous for its long term stability - it doesn't yellow or crack in UV light. Acetone is a fast drying solvent, meaning that you can work quickly. Most importantly, Paraloid B-72 is NOT soluble in white spirit.
Layer 2: THE FILLING
This will depend in part on the substrate (fossil or matrix composition), the colour, and to a large degree personal preference in terms of application and aesthetics. In the same way you might select your sandwich fillings in the morning before work, it's time to choose the best filling for your archival sandwich! We'll talk through your different options in the next section.
Layer 3: TOP COAT
The last layer to be applied is the top coat. We use Paraloid B-67 20% wt/vol in White Spirit. B-67 has good aging characteristics, although it can yellow a little over time. We use a solution in white spirit, as this can be applied directly over the top of the Paraloid B-72 barrier layer without disturbing it. The white spirit is also less likely to disturb any inks used than acetone.
METHOD
- Check any health and safety requirements. Familiarise yourself with the safety information on the various products you will use. Gloves on, safety glasses on, and make sure you are working in a well-ventilated area!
- Ensure that the surface is not friable, dusty or likely to disintegrate. It may be necessary to consolidate the specimen with a number of applications of a low viscosity Paraloid B-72 prior to marking it.
- Select a clean area of the object's surface. You may need to use a little acetone on a cotton swab to clean an area.
- Load a brush with Paraloid B-72 20% wt/vol in acetone. If the brush is too full, it may drip, but you want enough of the solution to create a good barrier.
- For smooth surfaces, use a steady movement to apply Paraloid on an area on a little larger than the size of the number/label. You can then apply the Paraloid in the opposite direction. If the surface is more porous, you may need 2-5 coats, allowing each to dry between applications. You should be left with a soft sheen visible on the surface. You can trial this by testing on a similar piece of scrap rock, and seeing if ink is able to penetrate and if it is easy to remove the marking with pure acetone.
- Then use one of the methods described to place your collection number on the fossil.
PAPER LABELS
- Any colour rock/fossil
- Suitable for all substrates
- Stands out well against a background
- Easiest option for rough surfaces where it may not otherwise be possible to write legibly


You may think it's simpler just to print out a ream of collection numbers and stick them on. This may indeed be your best option if you have messy handwriting! However, it's really hard to find suitable printer ink or toner that is permanent. It needs to be durable, resistant to abrasion, not smudge, be printed on acid free paper, be lightfast (i.e. not fade - ideally carbon pigmented), insoluble in water, insoulable in white spirit or the topcoat.
If the ink or toner conforms to ISO 11798:1999 this means that it is considered permanent and durable. Some manufacturers will list on their websites whether their ink or toner meets this standard, others would need to be contacted.
WHITE PAINT WITH PEN
Use a titanium oxide based pigment. Titanium oxide is lightfast which means it doesn't fade or yellow. It is considered stable. Golden Fluid Acrylics Titanium White has an easy working consistency, and can be applied with a brush.
Paint a neat little rectangle on top of the barrier coat of Paraloid B-72. Wait until it has dried. You can then write on this with a Sigma Micron marker, an Identi-pen, or lightfast ink.

WRITING WITH WHITE PAINT
- Dark colour rock/fossil
- Suitable for smooth substrates

BLACK PEN
- Light colour rock/fossil
- Suitable for smooth substrates

You can see in this example, more than just a number is written. Whilst the museum standard is using numbers and linking this to catalogue records, if you feel the only way you are likely to record information is by writing a small, but informative label on the fossil - then go for it! Recording some information is better than none at all.
7. When this layer has fully dried, use Paraloid B-67 20% wt/vol soluton in white spirit. Spread lightly, avoiding the brush bristles themselves touching the marking as this may disturb the ink. One coat should be plenty, but if you think the number is at risk of abrasion, you can apply as many as you feel is necessary.
8. If at any point you make a mistake, use a cotton swab soaked in acetone to remove it.
Assembling your archival marking kit
Many of the archival marking products are available off-the-shelf in our online store. They can be purchased individually or as part of a bundle. Please not that some products cannot be shipped outside mainland United Kingdom. We have alternative options for international customers, but you will need to purchase the solvents locally and mix solutions yourself.
You can see our article here on how to mix Paraloid B-72. The same principles will apply with Paraloid B-67 in white spirit, but it will take much longer to form a solution. Regular agitation is key. In a home environment, if you are able to supervise the container at all times, you can use the heat from a radiator to help the process move a bit faster. Never leave it unattended on a hot surface.
Extra Reading
Collections Trust, 2020. Labelling and Marking Museum Objects booklet. Download from this link.
Davidson et al., 2006. Assembling an Archival Marking Kit for Paleontological Specimens. Read here
Thank you for reading this article. If you have any comments or suggestions we are always grateful to hear the thoughts of people with far more expertise than ourselves.