REWOQUAT PREPARATION
Rewoquat is one of the easiest and least stressful chemical preparation techniques. It’s very gentle, and works slowly giving you lots of time to check up on it. It is milder than using KOH (potassium hydroxide) and will not attack calcite regardless of the length of exposure. One of the best bits is you buy it once, and you can use it over and over and over. It doesn't lose it's effectiveness or get 'used up'.
Rewoquat is a surfactant. Surfactants are a primary component used in all detergents from dishwasher soap to laundry detergent to car washes. Surfactants help detach solid particles from another solid surface, e.g. dirt particles are removed from clothing. They hold these particles in suspension which sink to the bottom and so they can be removed. We can apply some of the same principles to removing rock from fossils using the surfactant Rewoquat 3690PG.
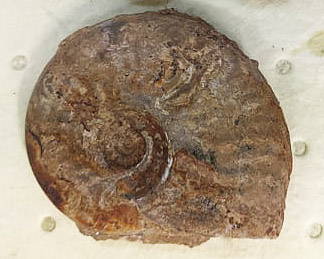
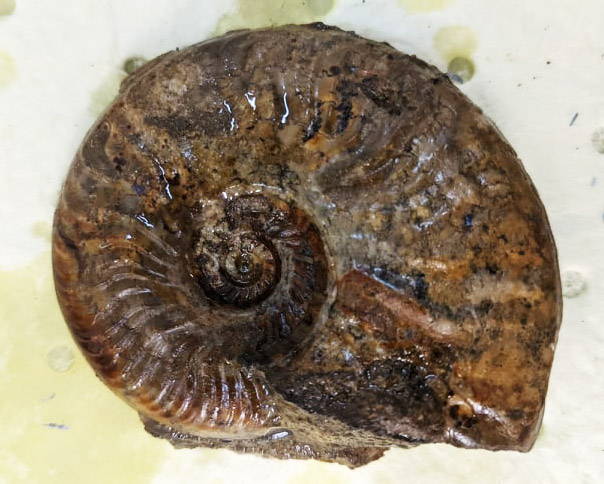
A before and after with Rewoquat on an Inferior Oolite ammonite from Dorset. The calcite composition of this ammonite made it a great candidate for Rewoquat preparation, and indeed with this one it only took 4 hours to get to the result on the left. Once dry, we will coat it with AKEMI polishing fluid to help with the colour intensification, without adding too much shine.
Rewoquat 3690PG can be used to remove thin marl layers from fossils. It swells and softens the sediment, which either drops off to the bottom of the container or is now soft enough to remove with picks and scalpels. Rewoquat can be used on marly or oolitic rocks. The term ‘marl’ is a bit vague, but it usually refers to a fine-grained rock that is a mixture of clay and calcium carbonate, sometimes containing bits of the mineral glauconite, sand and shell fragments. The more clayey the rock, the more effective the Rewoquat and the quicker it will work. If the rock contains a higher proportion of calcium carbonate, the Rewoquat is less effective.
The fossil must have calcite preservation or a calcite shell. If the fossil is completely or partially the same composition as the rock, Rewoquat cannot tell the difference and will disaggregate both. This is sometimes quite difficult to determine, as some chambers of an ammonite may be mud filled and other calcite filled.
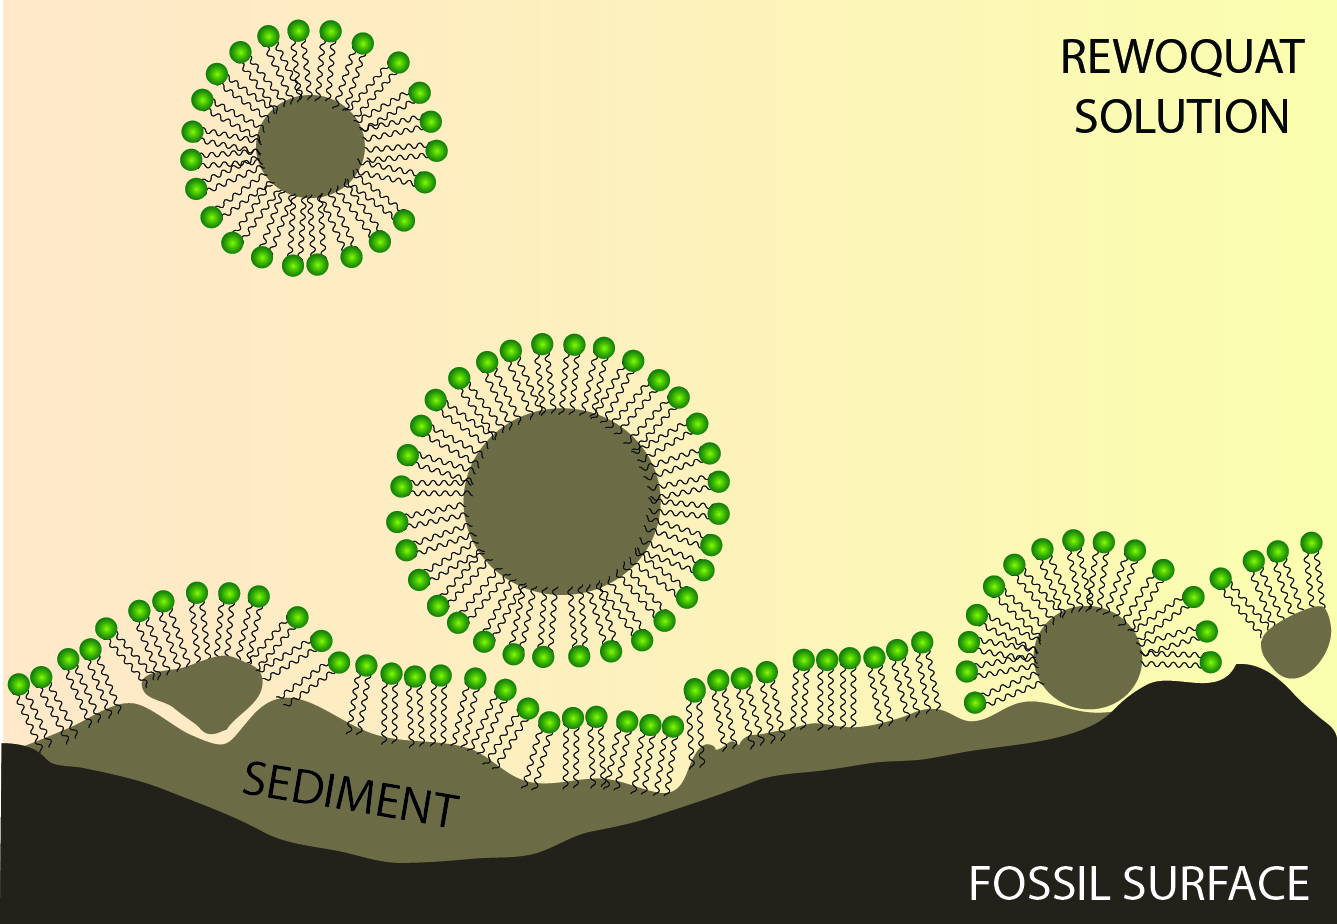
Rewoquat works by lifting sediment away from the calcite fossil surface. The hydrophobic tails of the surfactant molecules 'pick-up' small pieces of clayey rock. The heads (green) help suspend the pieces in the solution and keep them separate.
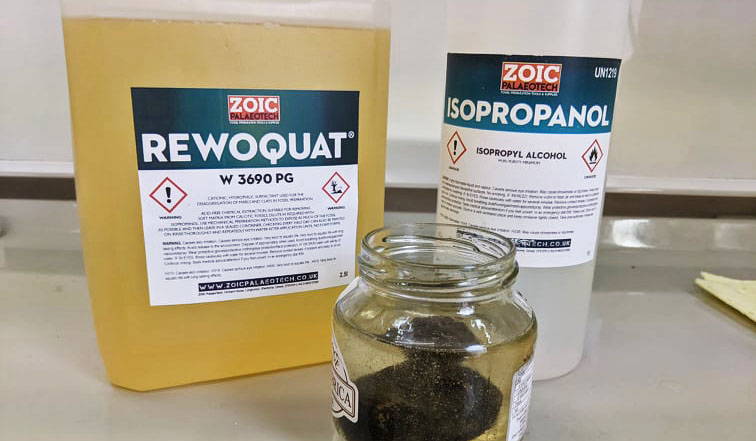
Rewoquat is a yellow, flammable and quite viscous fluid. It’s also environmental harmful and so must be handled with care. It can be recycled again and again and again though so you won’t have to worry about hazardous waste disposal for a while. If you do need to dispose of it, your local hazardous waste disposal centre is the place to go to (at least here in England).
How do I use Rewoquat?
Working safely with Rewoquat: Rewoquat can cause skin irritation as it is a very strong degreaser. Wear chemical handling gloves, safety goggles and have an eye wash station handy! Always use tweezers or forceps to put fossils in and take fossils out of the solution. Store the Rewoquat at room temperature, in a well ventilated place. If you find that it separates in colder weather, pop it on a medium heat radiator and it will recombine. Anything up to 40 degree heat will give you a homogenous solution again.
Rewoquat can be reused countless times. If it increases in viscosity over the years, just thin it out a bit with isopropanol. It will get increasingly dirty with a sludge of sediment, and so allowing the filth to settle to the bottom of the jar and then transferring the clean liquid to a fresh jar will have to be done occasionally.
Before you begin, work as close as you can to the stone using air scribes, which gives the Rewoquat less work to do as the process is quite a slow one. It works best on small, thin crusts that remain or stubborn patches.
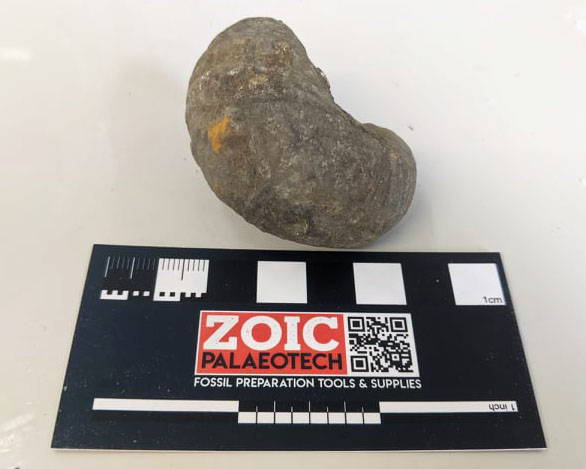
Before: A Gryphaea arcuata from the Frodingham Ironstone. There is a very thin crust of sediment adhered to the surface. This could be air abraded, but this risks that 'melty' appearance. Chemical preparation will help crisply preserve the details of the shell. We will be watching carefully to check that the boundary between the two parts of the shell isn't destroyed.
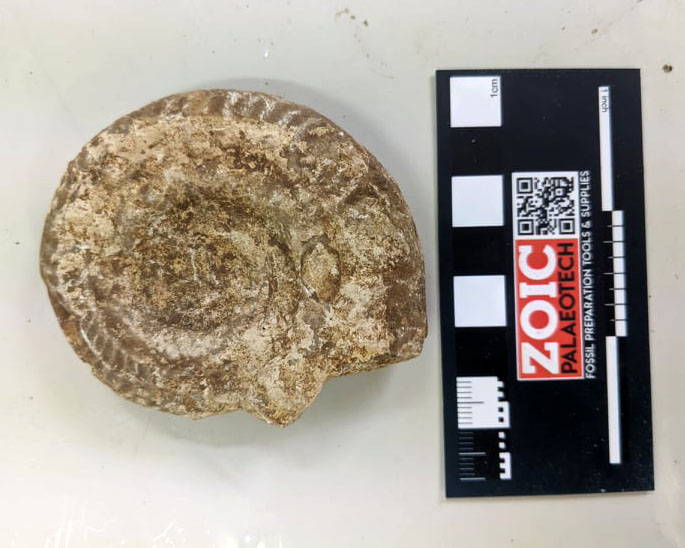
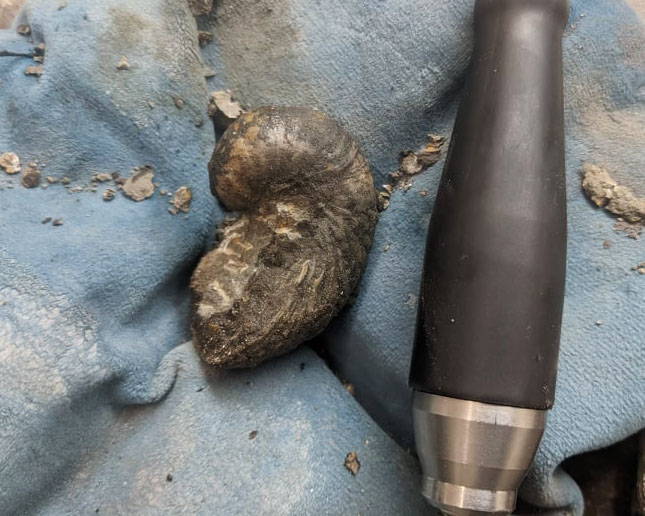
Before: A Hildoceras from Ilminster, Somerset. As far as we can tell this is a crystalline specimen (calcite preservation), but there may be some mud filled chambers. Time will tell how this one will turn out, but with frequent checks we hope that this will come up well.
1. Make sure the fossil is dry and immerse in Rewoquat for 10-12 hours for the first round. A tightly closed container is important, such as a jam jar, a bucket with a lid, or Tupperware container. You want to keep it airtight as Rewoquat is diluted with isopropanol (and you may need to further dilute it with isopropanol as different batches have different viscosities - you don't want it too gloopy). The isopropanol can evaporate even within the container you are using so make sure the air space is minimal. You will have to account for displacement when the fossil is placed into the Rewoquat, so don't go right up to the top.
2. Check the fossil after the first round. You may find that the mud has already become loose. Remove with tweezers/forceps and rinse very thoroughly under lukewarm running water.
3. If there’s still a way to go, put it back in for another round.
4. Put the mud that has washed off into a kitchen strainer if you like and look for microfossils if you feel like it!
5. Once you are happy the preparation is complete, soak the fossil in water. Keep changing the water until soap bubbles no longer form.
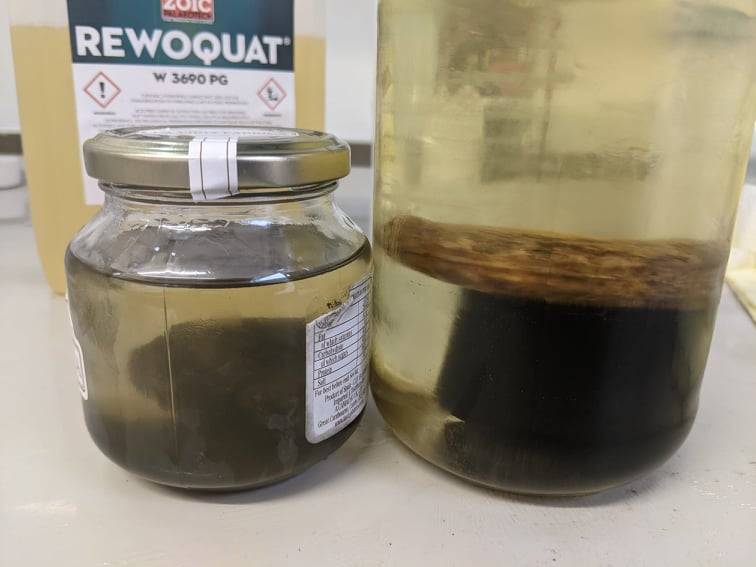
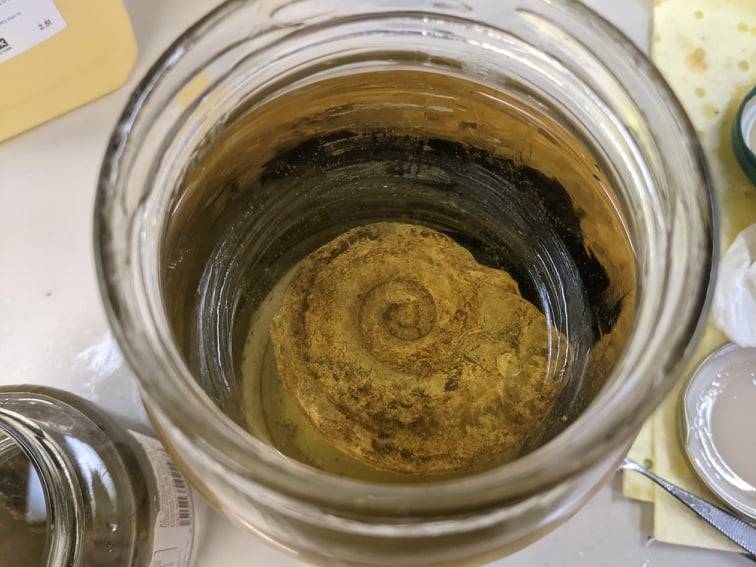
The two fossils in their respective jars. after 2 hours You can see the dark blur of sediment at the base of the left jar, where the sediment has come away from the fossil and sunk to the bottom. The keel of the Hildoceras is also much more apparent than it was to begin with, showing that the Rewoquat is working! The ammonite is suspended off the base of the jar with a scrap tube of plastic. This is because it is quite flat and we want to avoid it sitting in the sediment at the base of the jar.
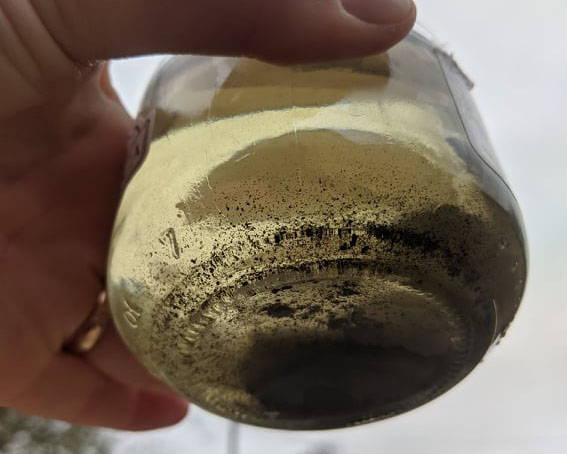
This is the jar with the Gryphaea after only 10 minutes. A lot of the grains are quite sandy and have already sunk to the bottom.
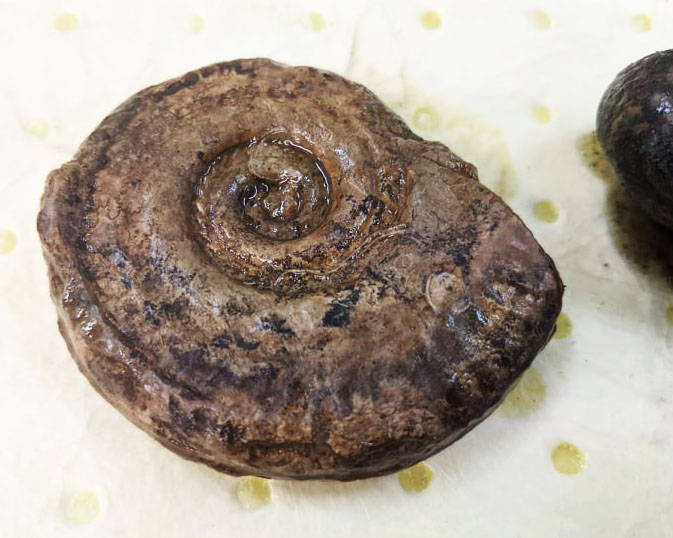
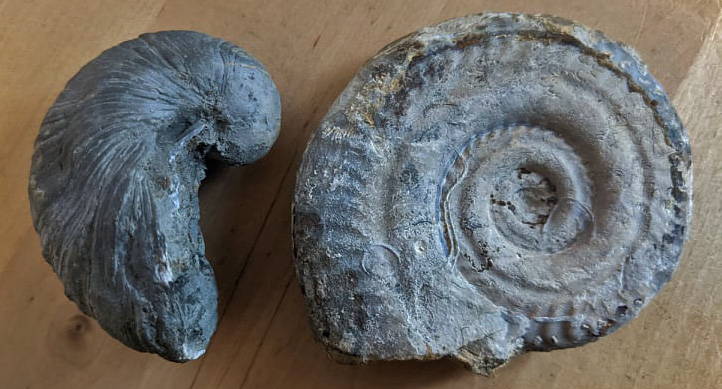
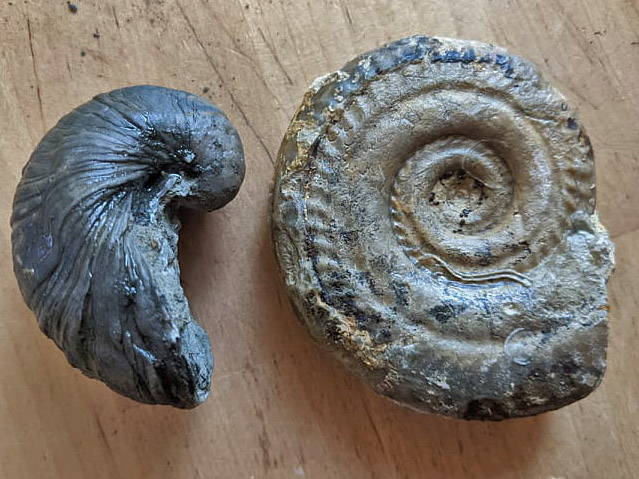
The Hildoceras after approximately 2 hours. This specimen is progressing more rapidly in the Rewoquat than anticipated and is already starting to look really good! You don't usually need to check this often. We are just documenting the progress here for your reference.
7 hours progress. The Hildoceras hasn't changed that much, but the sutures are showing very well, and thankfully no unknown mud-filled chambers have surfaced. The centre still had a bit of matrix, but this was now so soft that it was possible to scratch it away with a dental probe (a scalpel would do just as well). Then back into the Rewoquat.
A quick check on the Hildoceras after 2 hours. It's clear even through the liquid that progress has been made.
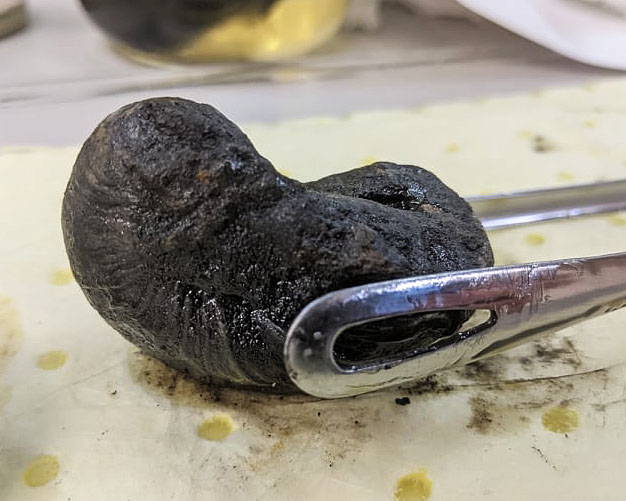
The Gryphaea after approximately 2 hours. There is still clearly a long way to go, but the shell is become clearer and lighter in colour, with the sediment crust starting to really shift in some areas.
7 hours progress. The Gryphaea is coming up beautifully. We can now see some encrusting faunas starting to show from when it was on the seafloor. At this stage, now it's much clearer where the fossil is and an operculum (lid) hasn't appeared, we are confident to rinse in isopropanol, dab dry with kitchen roll, and do a bit of penning to remove some of the bulk matrix with more confidence than at the beginning.
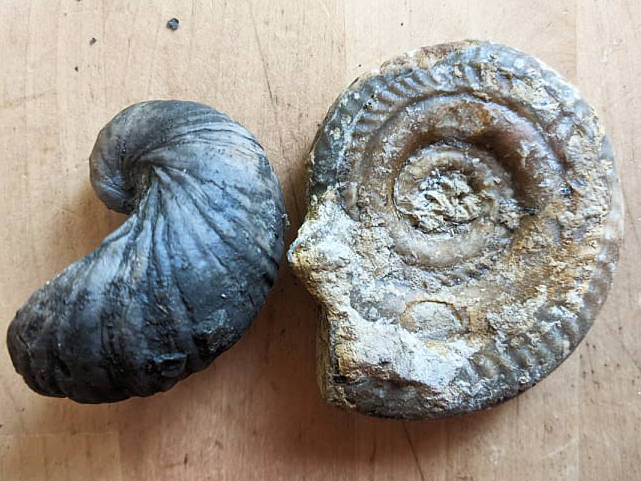
The process is a slow one, but with next to no human involvement and very little risk of damage, it's an easy one. Neither fossil in these examples would have come out as well if penned, and might have developed that 'melty' look if abraded. With a more finely ribbed ammonite, the results would be even more impressive. This approach, despite taking several hours to several days, realistically only took about 10-15 minutes of actual contact time. The other advantage is that you could prep several similar fossils at once.
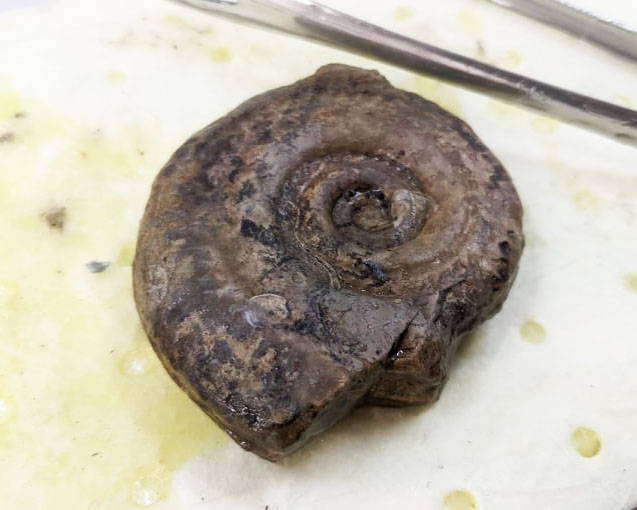
This is after approximately 12 hours in Rewoquat. We took out the fossils, gave them a really good scrub under the tap, soaked them in water until bubbles stopped forming and then left them out to dry overnight. There were still some stubborn patches of sediment, so we'll put these in for another round.
After a further 10 hours in Rewoquat only a little more sediment budged, and so we've likely reached the limits of what we are going to achieve. One side still has some more firmly cemented sediment, which could either be air abraded, or removed using KOH with a targeted application (as this poses more risk to damaging the calcite than Rewoquat). The fossils look even better in real life than in the photos.
Learn more about each of the techniques by clicking the links below:
SHARING OUR KNOWLEDGE
We are committed not only to making the best fossil preparation tools, but we also love to share our knowledge to help you prep your best. If you feel that we are missing something important from this article, or have any photographs you would be happy to share with us we would be delighted if you drop us an email! We love to see before and afters, learn new tricks and see what you've been up to! We can be contacted using the link below or on info@zoicpalaeotech.co.uk.